Learn how to seamlessly mirror your Android device to your PC using Scrcpy over wireless debugging, plus an introduction to a custom tool to make the connection process effortless.
We have all been there. You want to show something from your phone on your computer screen, record a quick mobile app demo, or just reply to messages without picking up your device.
The usual solutions involve messy USB cables that tether you to your desk or third-party casting apps that lag, lower the video quality, and bombard you with ads. Trying to get a clean, fast screen mirror shouldn't be a frustrating experience.
There is a better way. Meet Scrcpy, a lightweight, open-source tool that provides low-latency, high-performance display and control of Android devices natively from your PC. Best of all? You can run it entirely wirelessly.
Why You Should Use Wireless Debugging
By combining Scrcpy with Android's built-in Wireless Debugging feature, you get a powerful setup:
No Cables Attached: Keep your phone charging across the room while you control it entirely from your laptop.
Top-Tier Performance: Scrcpy is renowned for its low latency and high framerates.
Completely Free: No premium versions, no watermarks, and no shady data collection.
How to Set Up Scrcpy Wirelessly
To get this working, you need your phone and your PC connected to the same Wi-Fi network.
Download the latest .zip release for Windows, or install it using your preferred package manager via their installation guide.
If you downloaded the .zip file, extract it to a dedicated folder on your computer.
Step 2: Enable Wireless Debugging on Your Phone
Next, we need to prepare your Android device.
Go to your phone's Settings > Developer Options. (If you haven't enabled Developer Options yet, go to "About Phone" and tap your "Build Number" 7 times).
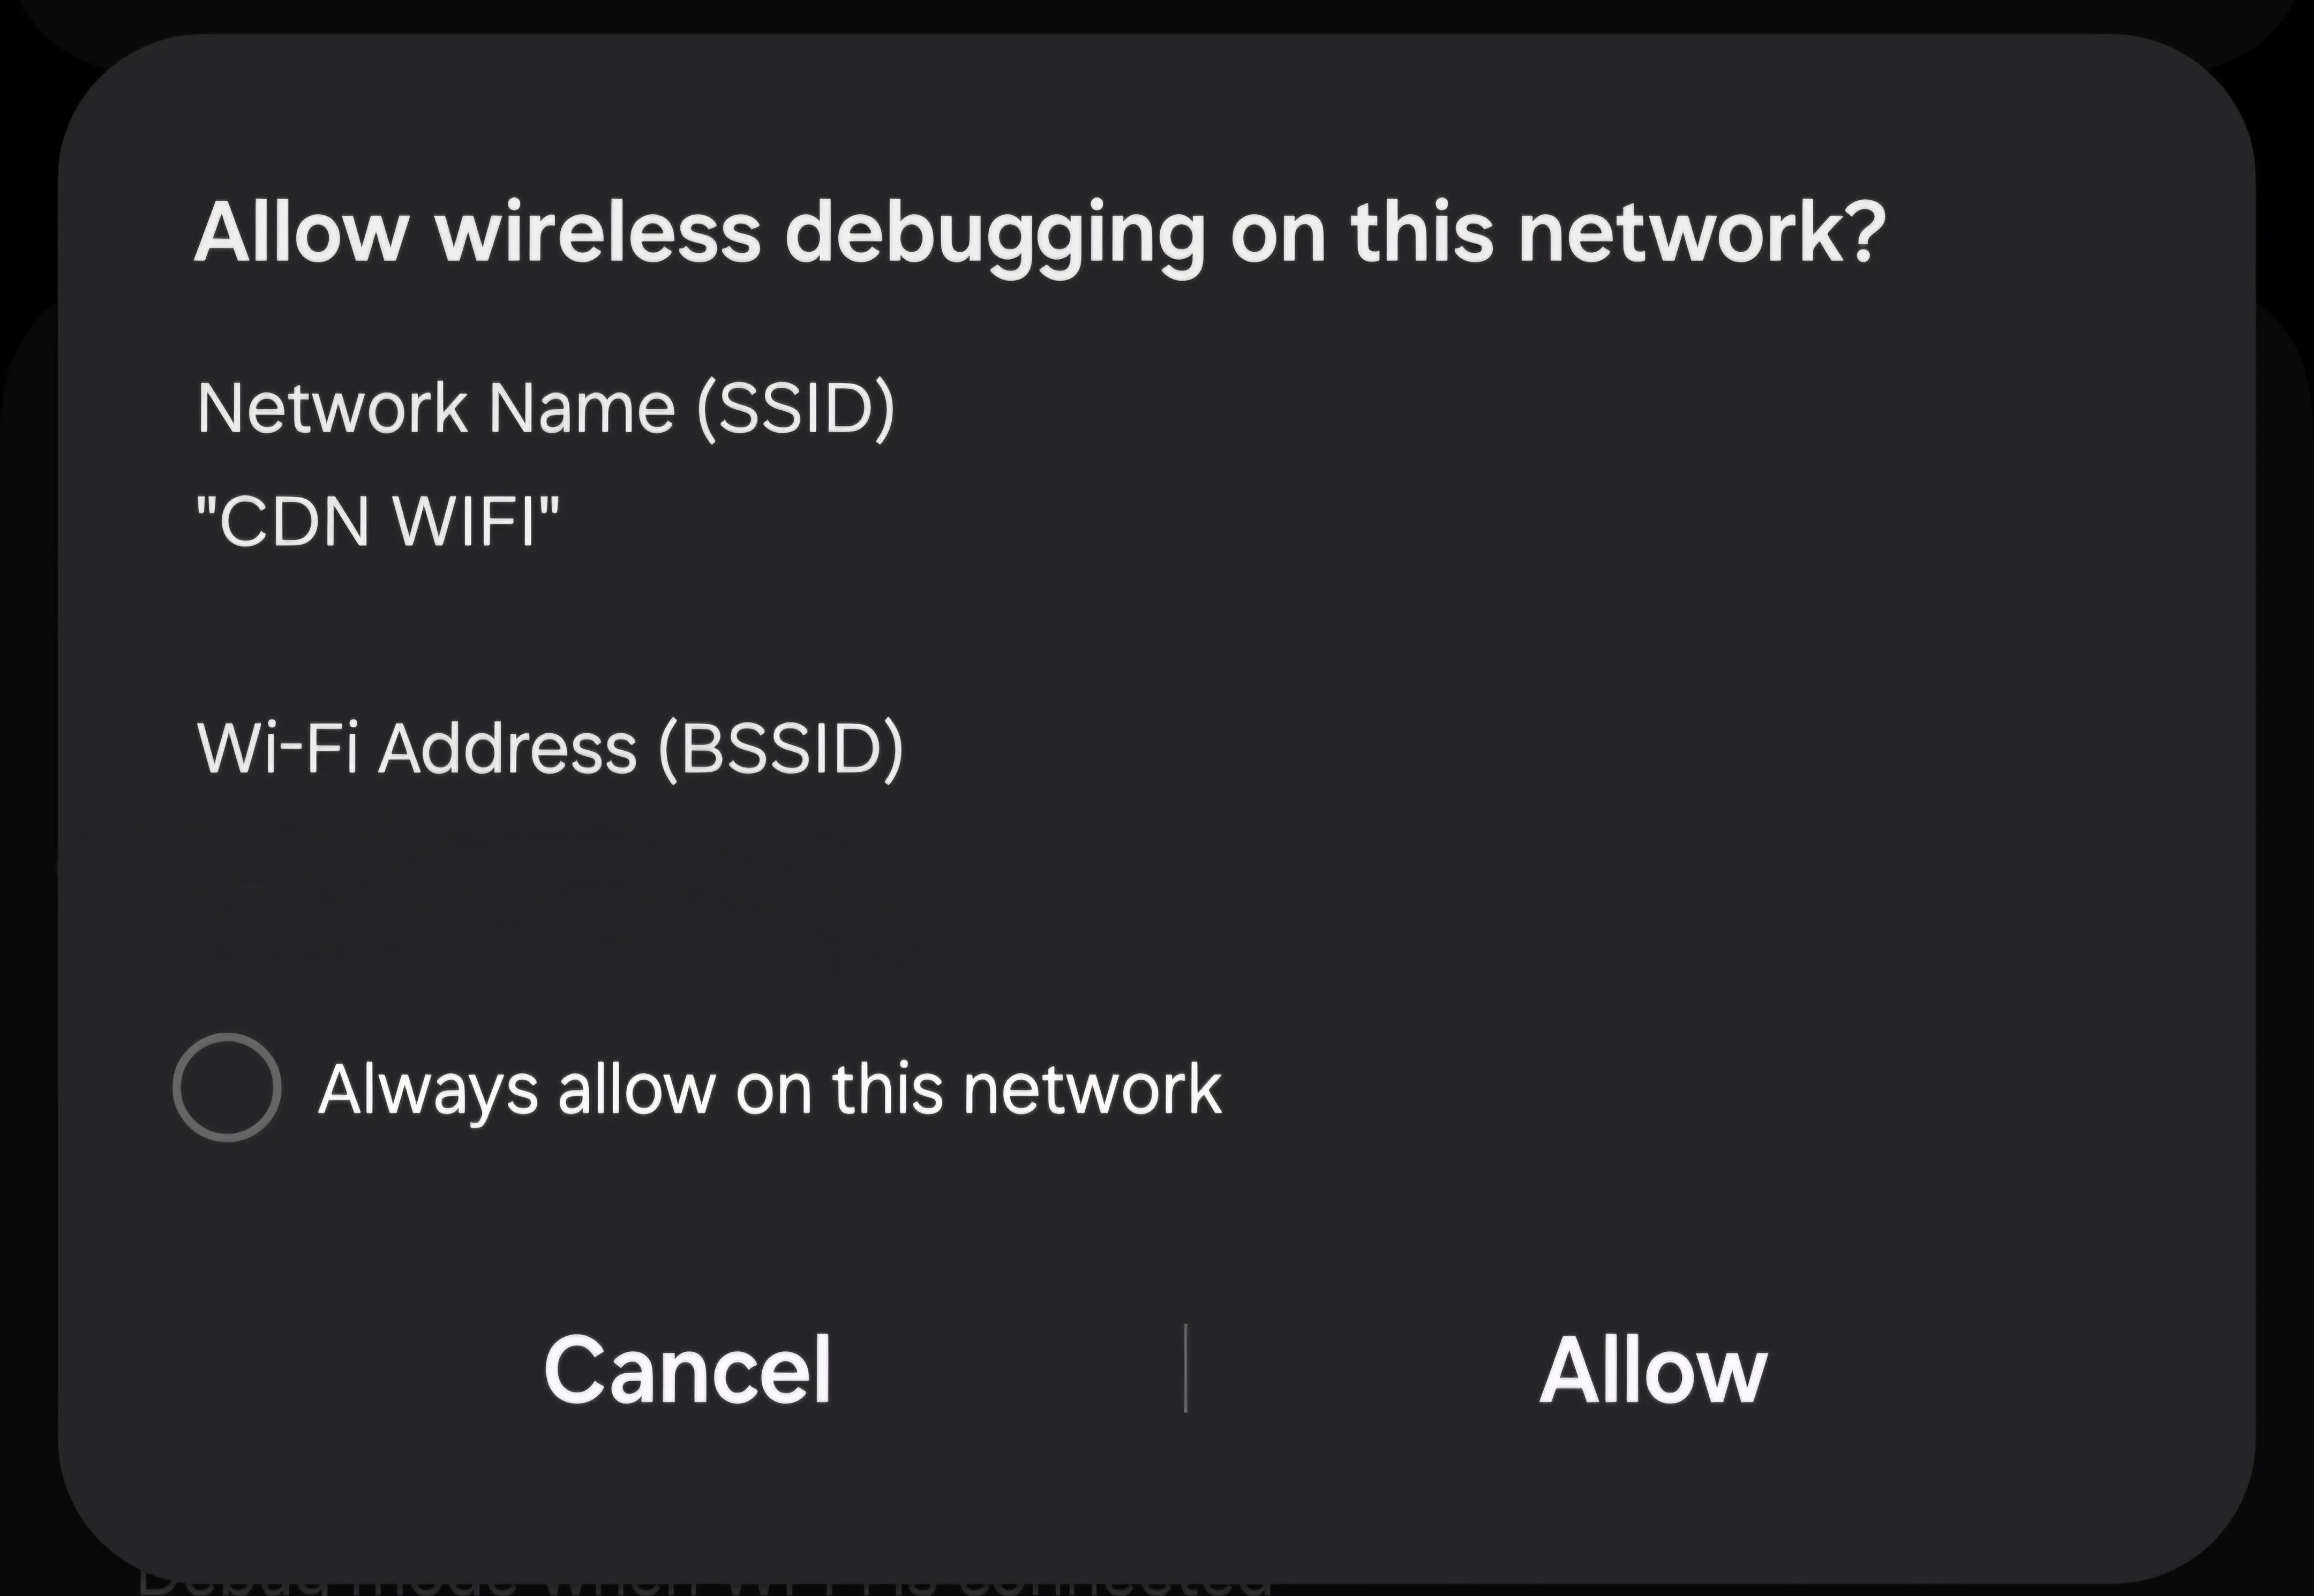
Scroll down and toggle on Wireless debugging. You will have to allow it on your current network.
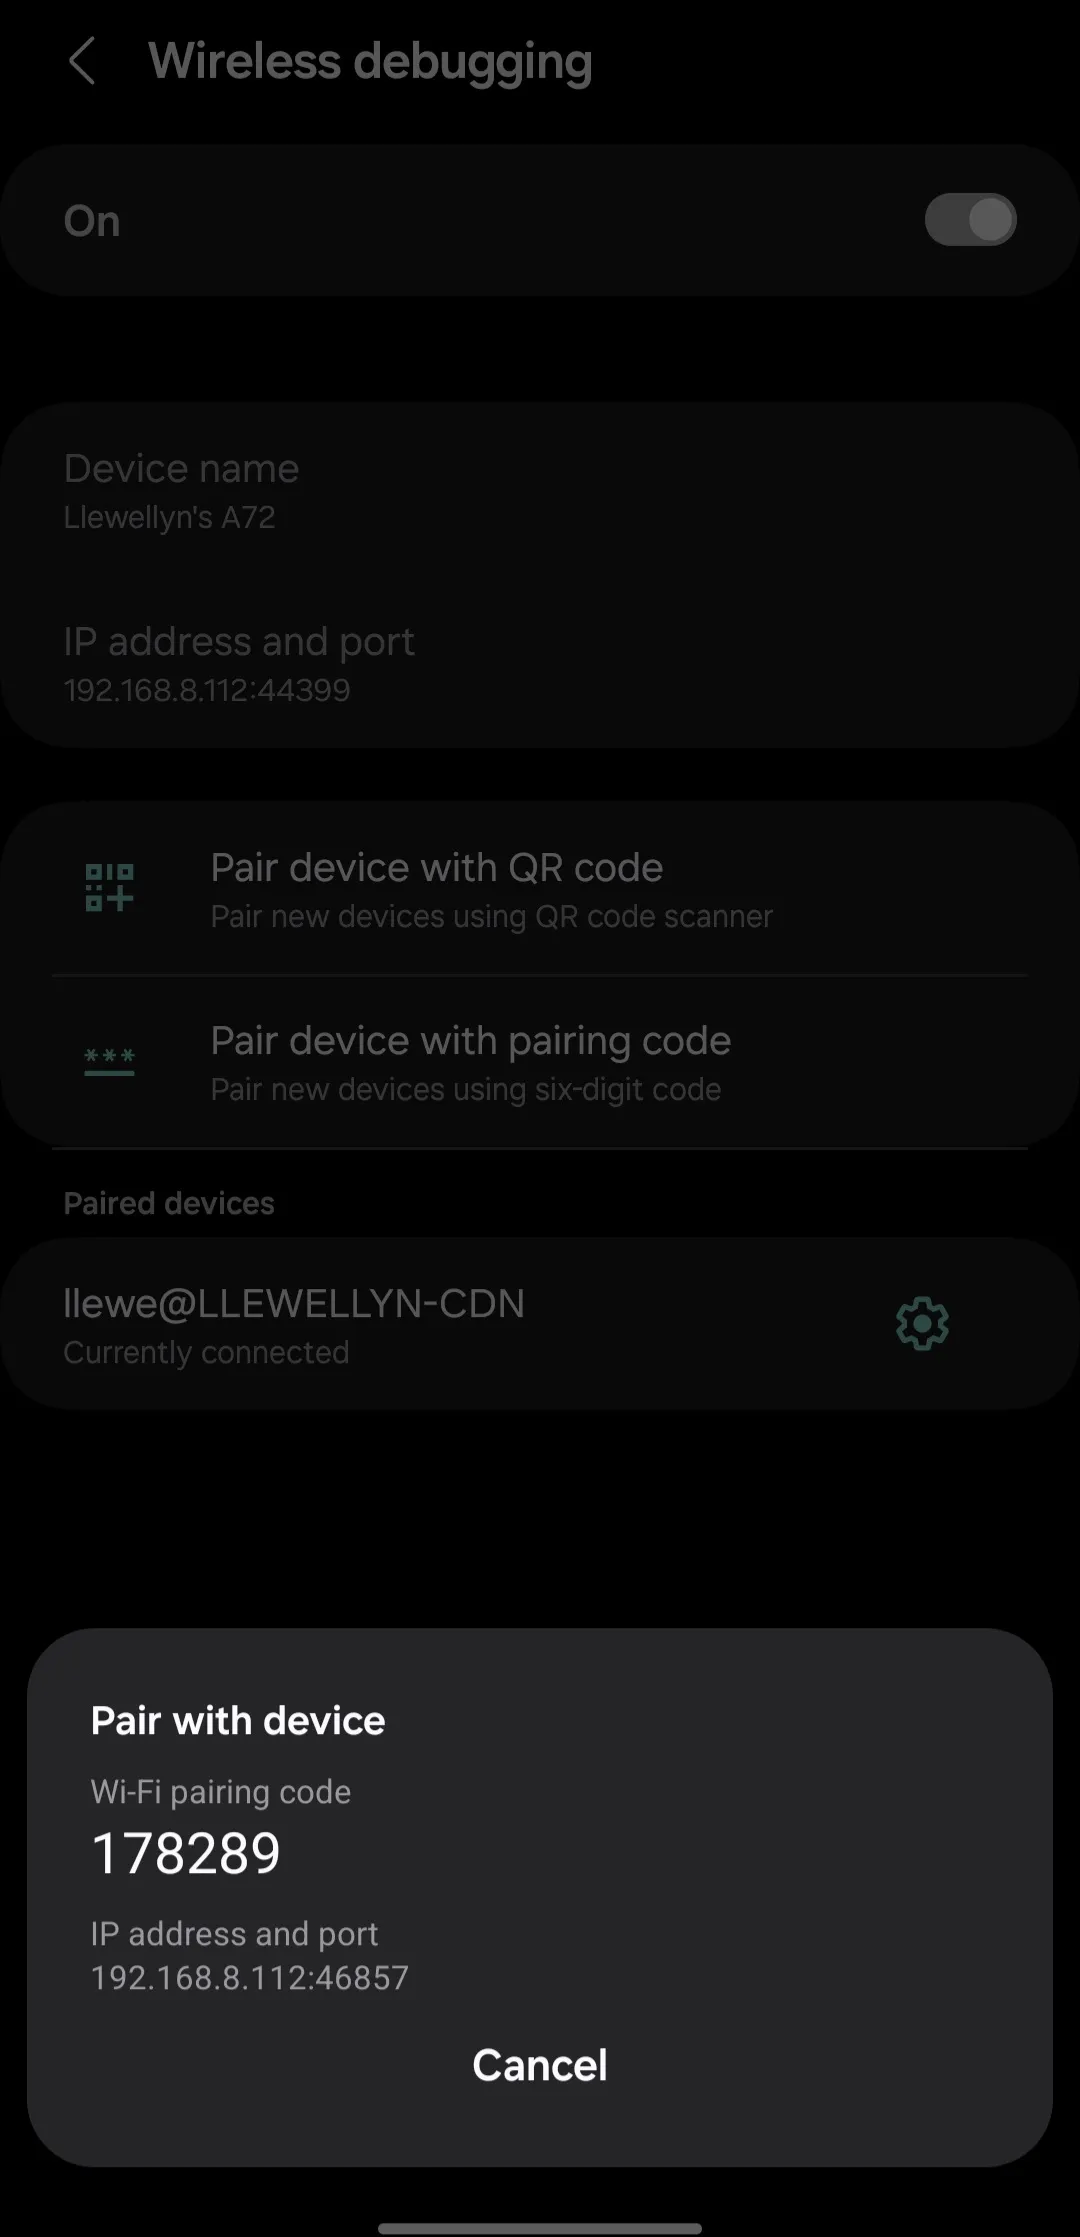
Tap on the "Wireless debugging" text to open its menu.
Select Pair device with pairing code.
Keep your screen on. You will see an IP address, a port, and a Wi-Fi pairing code.
Step 3: Pair and Connect from Your PC
Now, let's link the two devices.
On your laptop, open your terminal or command prompt. (Note: If you downloaded the .zip file, make sure to open the terminal directly inside the extracted folder and run every command below with ./ leading it).
Run the pairing command using the exact IP and port shown on your phone's pairing screen:
adb pair <IP-address>:<port>
When prompted in the terminal, enter the pairing code from your phone screen.
Once successfully paired, look back at the main Wireless Debugging screen on your phone. Find the active connection IP and port (this port will likely be different from the pairing port).
Connect to that active IP and port by running:
adb connect <IP-address>:<port>
Finally, launch Scrcpy perfectly like normal by typing:
scrcpy
Your phone screen should now instantly pop up on your computer!
Troubleshooting
Error: unknown host service
You might enter the six-digit pairing code and then get:
error: unknown host service
This usually means the adb command you just opened is talking to an older ADB server that was already running in the background. The command-line client understands wireless pairing, but that background server does not.
From inside your Scrcpy folder, restart ADB using:
./adb kill-server
./adb start-server
./adb version
If the error remains on Windows, force-close the conflicting ADB process and start the bundled version again:
taskkill.exe /F /IM adb.exe
./adb start-server
Now return to Pair device with pairing code on your phone. Use the newly displayed port and pairing code, because the previous ones may have expired:
./adb pair PHONE_IP:NEW_PAIRING_PORT
If another copy of ADB keeps taking over, where.exe adb will show every adb.exe Windows can find. Using ./adb from the extracted Scrcpy folder ensures that you run the copy bundled with Scrcpy.
Error: Multiple (2) ADB devices
After pairing and connecting, Scrcpy might report two devices even though you only have one phone:
ERROR: Multiple (2) ADB devices:
ERROR:     --> (tcpip)  192.168.8.123:44381  device
ERROR:     --> (tcpip)  adb-..._adb-tls-connect._tcp  device
ERROR: Select a device via -s
ERROR: Server connection failed
This happens when ADB can see the same phone twice: once through the IP address you connected manually and once through Android's automatic mDNS discovery. The final Server connection failed message is a consequence of Scrcpy not knowing which entry to select.
Run adb devices to see the available serials:
./adb devices
Then tell Scrcpy exactly which one to use. For example:
./scrcpy -s 192.168.8.123:44381
Replace that example address and port with the current IP connection shown by adb devices.
Alternatively, remove the manually created IP connection and let Scrcpy use the automatically discovered entry:
The scrcpy -e shortcut only works when ADB sees exactly one TCP/IP device. If the same phone appears twice, select its full serial with -s or disconnect one of the duplicate routes first.
A quick tip for the future: As long as your phone and PC are on the same Wi-Fi and Wireless Debugging is turned on, you usually do not need to pair again. Run adb connect PHONE_IP:CONNECTION_PORT, then launch Scrcpy. If ADB lists the phone twice, use scrcpy -s PHONE_IP:CONNECTION_PORT.
The Easier Way: Using Flect
If dealing with IP addresses, terminal commands, and ports every time sounds like a hassle, I built a tool to automate and simplify this entire workflow. It’s called Flect.
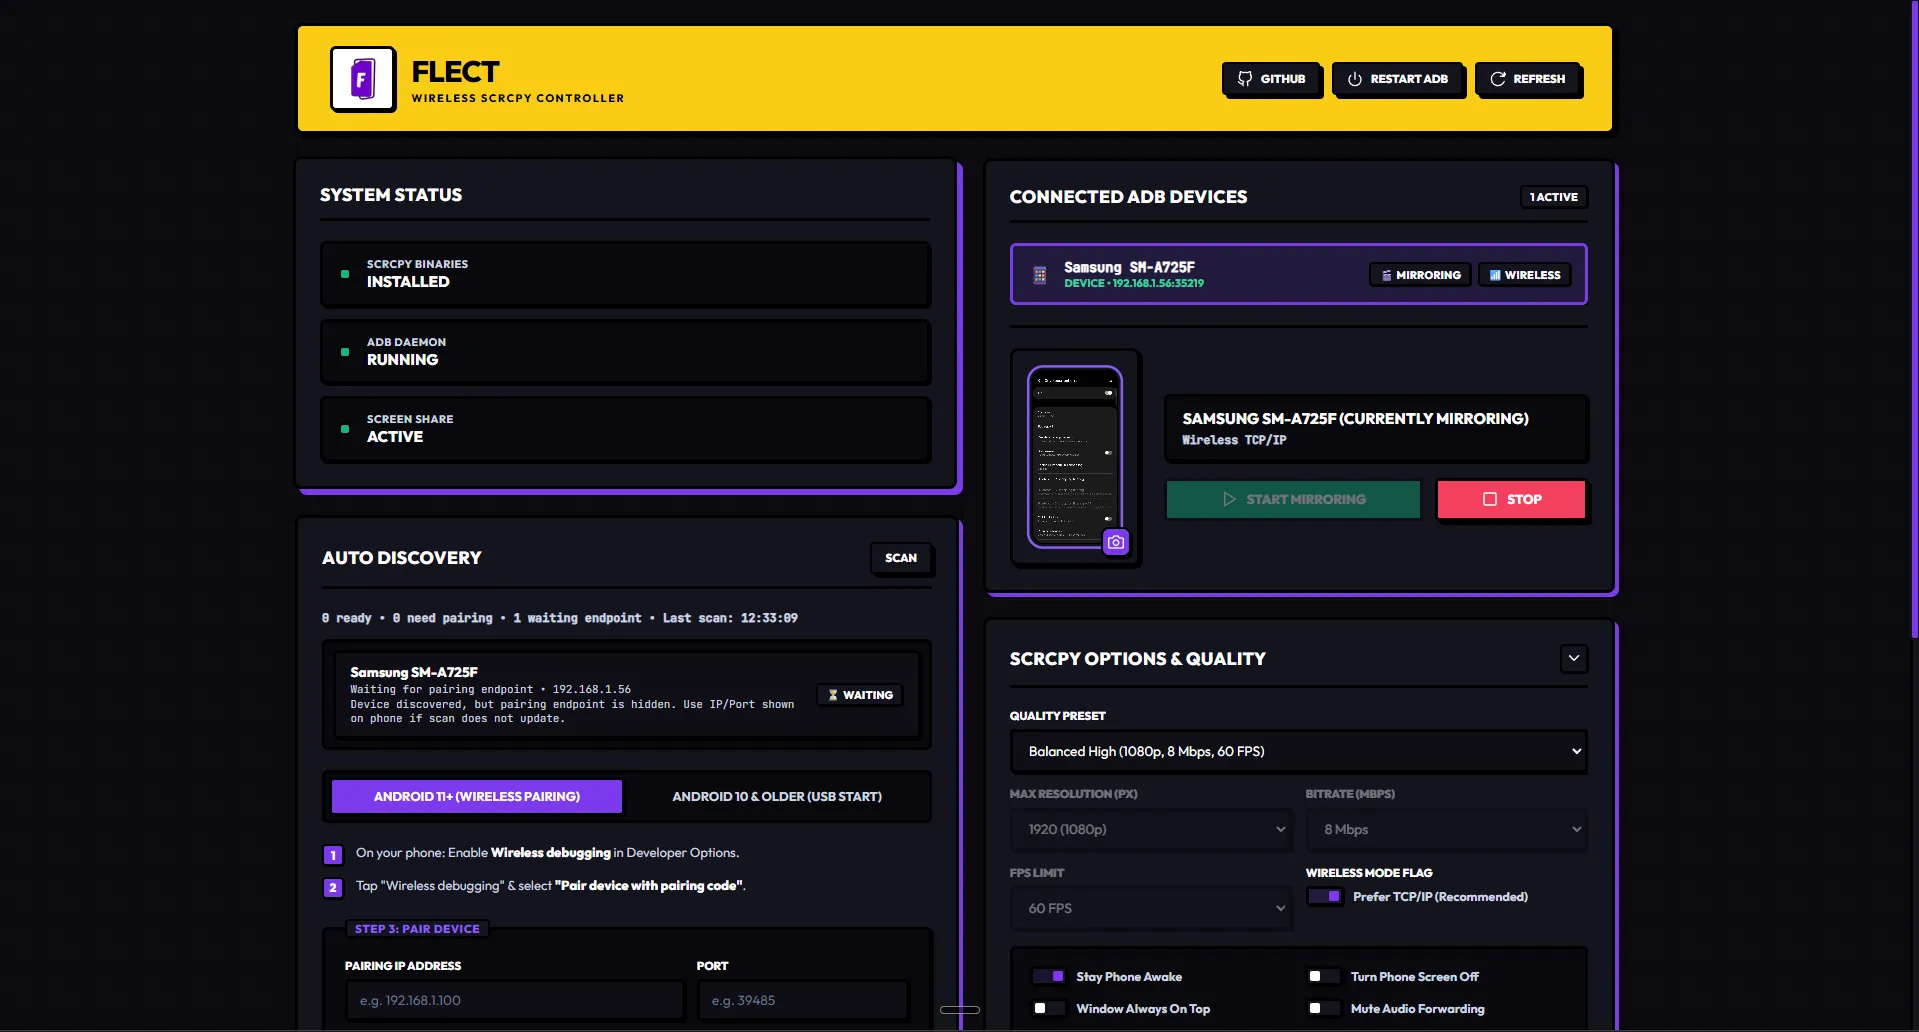
Instead of manually typing ADB commands, Flect gives you a clean web interface to handle the discovery and connection.
How to use Flect:
Clone the repository or download a new release directly from the Flect GitHub page.
Run the run.bat file to start the tool.
Make sure your phone and PC are connected to the same internet network.
Open the Wireless Debugging menu on your phone and tap Pair device with pairing code.
Open the Flect web interface and try the Discovery feature.
If the auto-discovery doesn't locate your device, just manually type the pairing IP address, port, and pairing code into Flect. Then, do the same for the connection IP address and port.
Click Start Mirroring.
And that's it! Flect handles the command line work in the background so you can get straight to mirroring your screen with just a few clicks.
Driven by a transformative moment that sparked a deep fascination with technology, I've been captivated by all its facets, particularly the visual aspects of software and video.
Android users have had Mihon for years, while iOS was stuck with popups and expired TestFlight betas. This guide walks you through setting up Aidoku on iPhone or iPad without needing a PC after day one.




Comments
0 comments · Page 1 / 1